paper mâché workshop
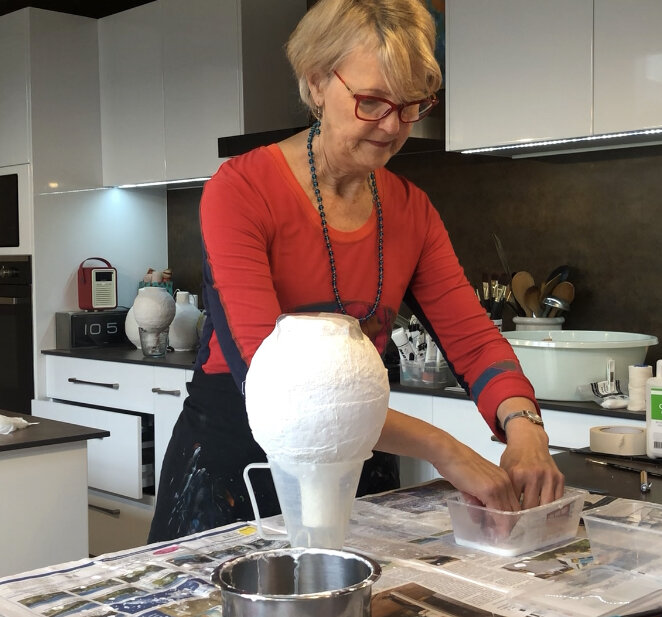
From time to time I hold a terrific workshop in South Fremantle teaching you how to make paper mâché pots from start to finish. This is a 3-hour demonstration workshop with time for some hands-on if so you can try your hand at the various steps. Bookings are essential due to limited numbers.
Paper mâché is one of my favourite things to do. It’s such a delight to work step-by-step towards a beautiful finished pot or bowl. Each step along the way is very tactile and and enjoyable to do.
In this workshop you will learn everything you need to know about making your very own pots and bowls using recycled and inexpensive materials.
I have spent quite a bit of time trying to work out the best way to teach paper mâché pot making or at least my version, and because it's a step by step process with drying time in between steps, it made more sense to do a workshop showing all the steps rather than a series of a classes in a course-like structure.
I have worked out the best process along the way researching like mad, making mistakes and learning so much as I refined techniques to get the best results. I love to share what I have learnt!

Reviews from previous workshops
“Thank YOU for such a relaxing morning. A retreat in every way, plus a great teacher showing us exactly step by step. So natural and lovely.” - SS
“Thank you so much for an informative and inspiring workshop yesterday. It was lovely to share the camaraderie of like-minded women in the warmth of your home while learning your paper mache techniques. I am looking forward to creating my first pot.” - PS
“Thank you dear Jan for today’s workshop. It was so professionally delivered, morning tea was great and your home was such a relaxing, beautiful environment to be in. I feel quite inspired.” - EF
Workshop Outline
Materials you need
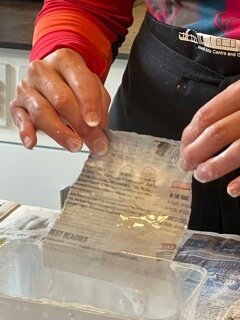
Paper pulp preparation and making:
Suitable papers
The process of making a good pulp
How to store for later use
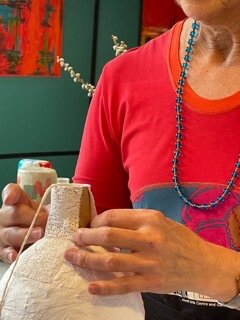
Creating the mould:
Items that can be used
How to incorporate: the base; a neck for a bottle shape pot; and other additions to create the shape
Making silicon moulds from favourite items
Building the layers:
My process of making a sturdy pot from the first layer up
Materials to use and demonstration of how to apply
Knowing how many layers to use
Making the final paper pulp mix and how to apply for best results
Creating the design:
Applying the first layer of paint
Creating your unique designs: paints and mixed media tips and hints
Sealing the finished bowl or pot
Tips on a good finish
The best lacquers to use
During the demonstrations participants are invited to try the techniques to get a feel for the art of making paper mâché art. You can see more of my paper mâché art here.


